Create a maintenance order
Modified on Sat, 25 May, 2024 at 12:23 PM
TABLE OF CONTENTS
- Scheduling and Deadlines
- Specify Participants
- Creating or adding maintenance tasks
- Capture additional order details
- Image documentation
- Signature for the Inspection Report
- Creating a Maintenance Report
With the maintenance order feature in TabTool PV O&M, it's easy to seamlessly document maintenance activities on solar installations, record issues for further processing, and finally create a comprehensive, professionally prepared maintenance report with just a few clicks. In this article, we will explain step-by-step how to create a maintenance order in TabTool.
Log in to the TabTool Office web application or the TabTool App to create a new maintenance order. In this article, we will describe the procedure using TabTool Office as an example.
Select the project for which you want to create the maintenance order.
In the upper section of the project file, go to "Orders" and select "Maintenance Orders" from the list below.
Then click the button in the upper left of the right column to create a new maintenance order.

First, assign the new maintenance order a job number (optional) and a descriptive subject, such as "Maintenance Inverter Strings 1-120".

In the "Description" field, you can provide a detailed scope of the order or list the individual services included. This information will appear at the beginning of the maintenance report for your customers.
Tip: To avoid entering the service description manually for each similar maintenance task, you can store text blocks for these in the master data. You can load these text blocks into the text field automatically by clicking on thesymbol.
Scheduling and Deadlines
If you already have a specific date in mind for the maintenance, you can create an "on-site appointment" by clicking on the "+" button in the "Dates" section.
If you want to add the maintenance order to an existing on-site appointment, click on the button .
.

For detailed instructions on creating a site appointment, please refer to the article Planning Assignments with On-Site Appointments (in German).
If you do not have a specific date in mind for the maintenance yet, you can instead specify a deadline by which the order should be completed. Additionally, you can indicate the priority of the order.

Specify Participants
In the "Participants" section, you can indicate who will perform the maintenance and, if applicable, who will verify the completeness of the maintenance report at the end.
You can link the respective individuals or contacts using the button or create and add new ones using the "+" button if the person is not yet registered as a contact in TabTool.
Good to know: If you create or link an on-site appointment for the maintenance order and specify participants (responsible persons) there, they will automatically be added as "Participants" to the maintenance order.
Creating or adding maintenance tasks
In the "Order details" section, you can create maintenance tasks or add them through linking. Maintenance tasks are necessary to document the maintenance process using a checklist and to record any defects discovered.
To create a new maintenance task, click on the "+ button". If you want to add an existing maintenance task to the maintenance order, click on the button.

In the form that appears in the right column, first enter a subject for the maintenance task and select the PV component to be maintained from the dropdown menu below.
If the component to be maintained is already stored in TabTool, you can link it to the maintenance task using the button. This way, the maintenance task will be recorded in the service history of the component.

Select the Maintenance Checklist
In the next step, you define which checklist will be loaded into the maintenance protocol. To do this, select the appropriate checklist for the component to be maintained from the "Scope of Maintenance" dropdown menu.

Please note: Selecting a maintenance scope is mandatory to access the required maintenance checklist for each task!Now the checklist for the maintenance order has been stored.

Info: If there is no suitable checklist stored for the component you want to maintain, or if the checklist is outdated and requires modifications or additions to checkpoints, as a TabTool user with the appropriate administrative rights, you can easily create or adjust checklists. The article "Creating Checklists for Maintenance Tasks" explains how to do this. Reload Checklists
The "Reload Checklists" button is relevant for you if changes have been made to a maintenance checklist in the checklist editor after you have created a maintenance task.

By clicking "Reload Checklists," older checklist versions in your maintenance task will be replaced by the most current version.
For this reason, you should not use this button in older, already completed maintenance orders, as relevant checkpoints may otherwise be retroactively removed.
Documenting Defects
If you discover a defect during maintenance, you can document it directly below the maintenance checklist in the "Maintenance Task" form.
Below the checklist, you will find the "Documentation" section with the "Defects" line.
Procedure in the TabTool App
To record a defect, click the "+ Add" button in the app.

Upon clicking the button, a window will appear displaying a list of all the defects already recorded in your project.

To attach one or more of these defects to the maintenance activity, select them and then click on "Link File" in the top right corner of the window.
If you want to create a new defect, click on the "+ Create New" button.

Procedure in TabTool Office
To create a new defect in the TabTool Office web application, click the "+" button in the "Documentation" section of the maintenance task.
Alternatively, use the button to link an existing defect that has already been entered in TabTool (for example, from a previous inspection).

All defects that you record in the maintenance tasks of a maintenance order are also listed in the "Defects in this Order" section of the maintenance order.

Note: You cannot create or link new defects at this point. This is only possible through the maintenance tasks. However, you will receive a clear list of all defects discovered within the scope of the maintenance order and can further process them if necessary.
Capture additional order details
In the "Order Details" section of the maintenance order file, you can provide additional details about the order under the list of maintenance tasks:
Maintenance results
You can summarize the maintenance results in a free text field. These will then be listed at the beginning of the maintenance report generated by TabTool.

Tip: Save time and effort when naming maintenance results by storing standard texts (text blocks) in the master data. You can automatically load these into the text field by clicking on the symbol and then adjust them as needed.
Required Tools
If you wish to specify which tools were used during maintenance, tap on in the section "Tools needed" in the app.

A dropdown menu will then open, allowing you to select the tool used.

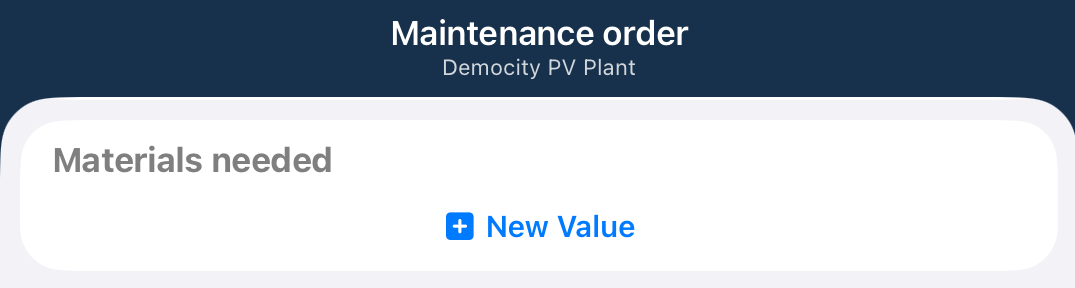
Required Materials
You can also record the materials used in connection with the maintenance order in the maintenance log. To do this, tap on  in the section "Required Materials" in the app.
Info: You can store all the details about the materials in the system master data in advance, so you only need to enter the consumed quantity in the maintenance log.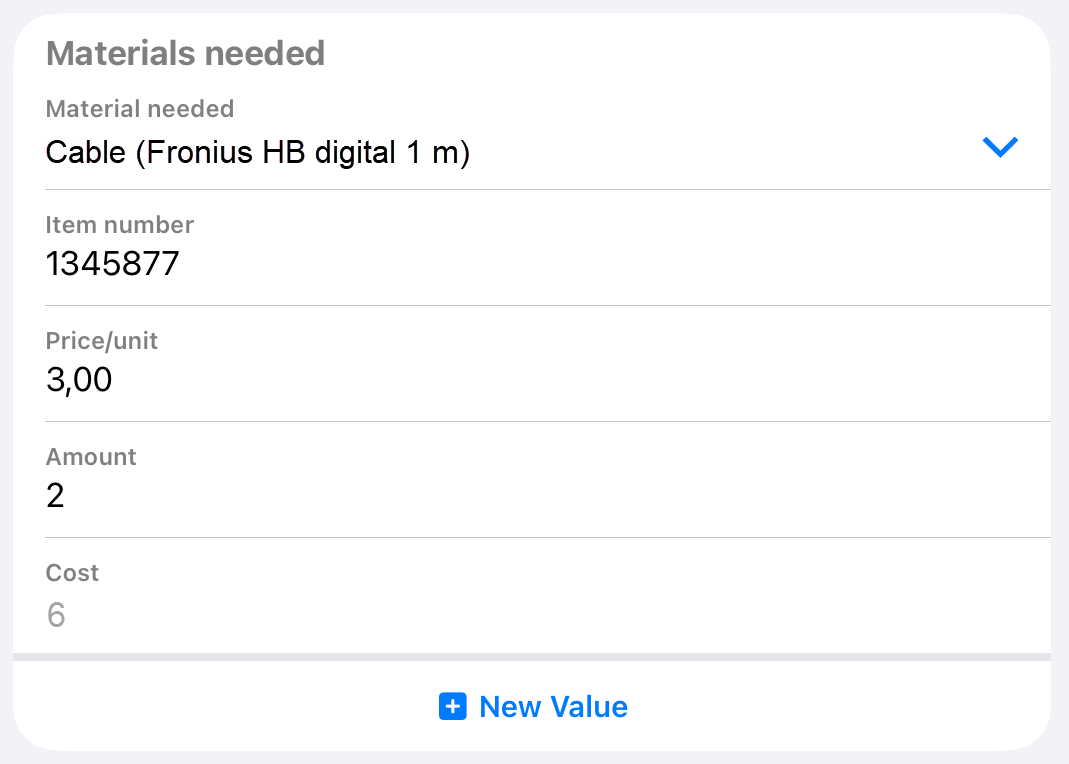
Image documentation
TabTool PV O&M offers various ways to capture images during maintenance. While photos of defects and anomalies should preferably be recorded in the corresponding defect file or associated maintenance task, you can capture all other relevant images in the "Image Documentation" section.
These images will be displayed at the end of your maintenance report, following the maintenance tasks and defect documentation.
Images intended solely for internal information sharing and not to be included in the maintenance report can be recorded in the "Internal Notes" section.
Signature for the Inspection Report
 and enter your name and signature.
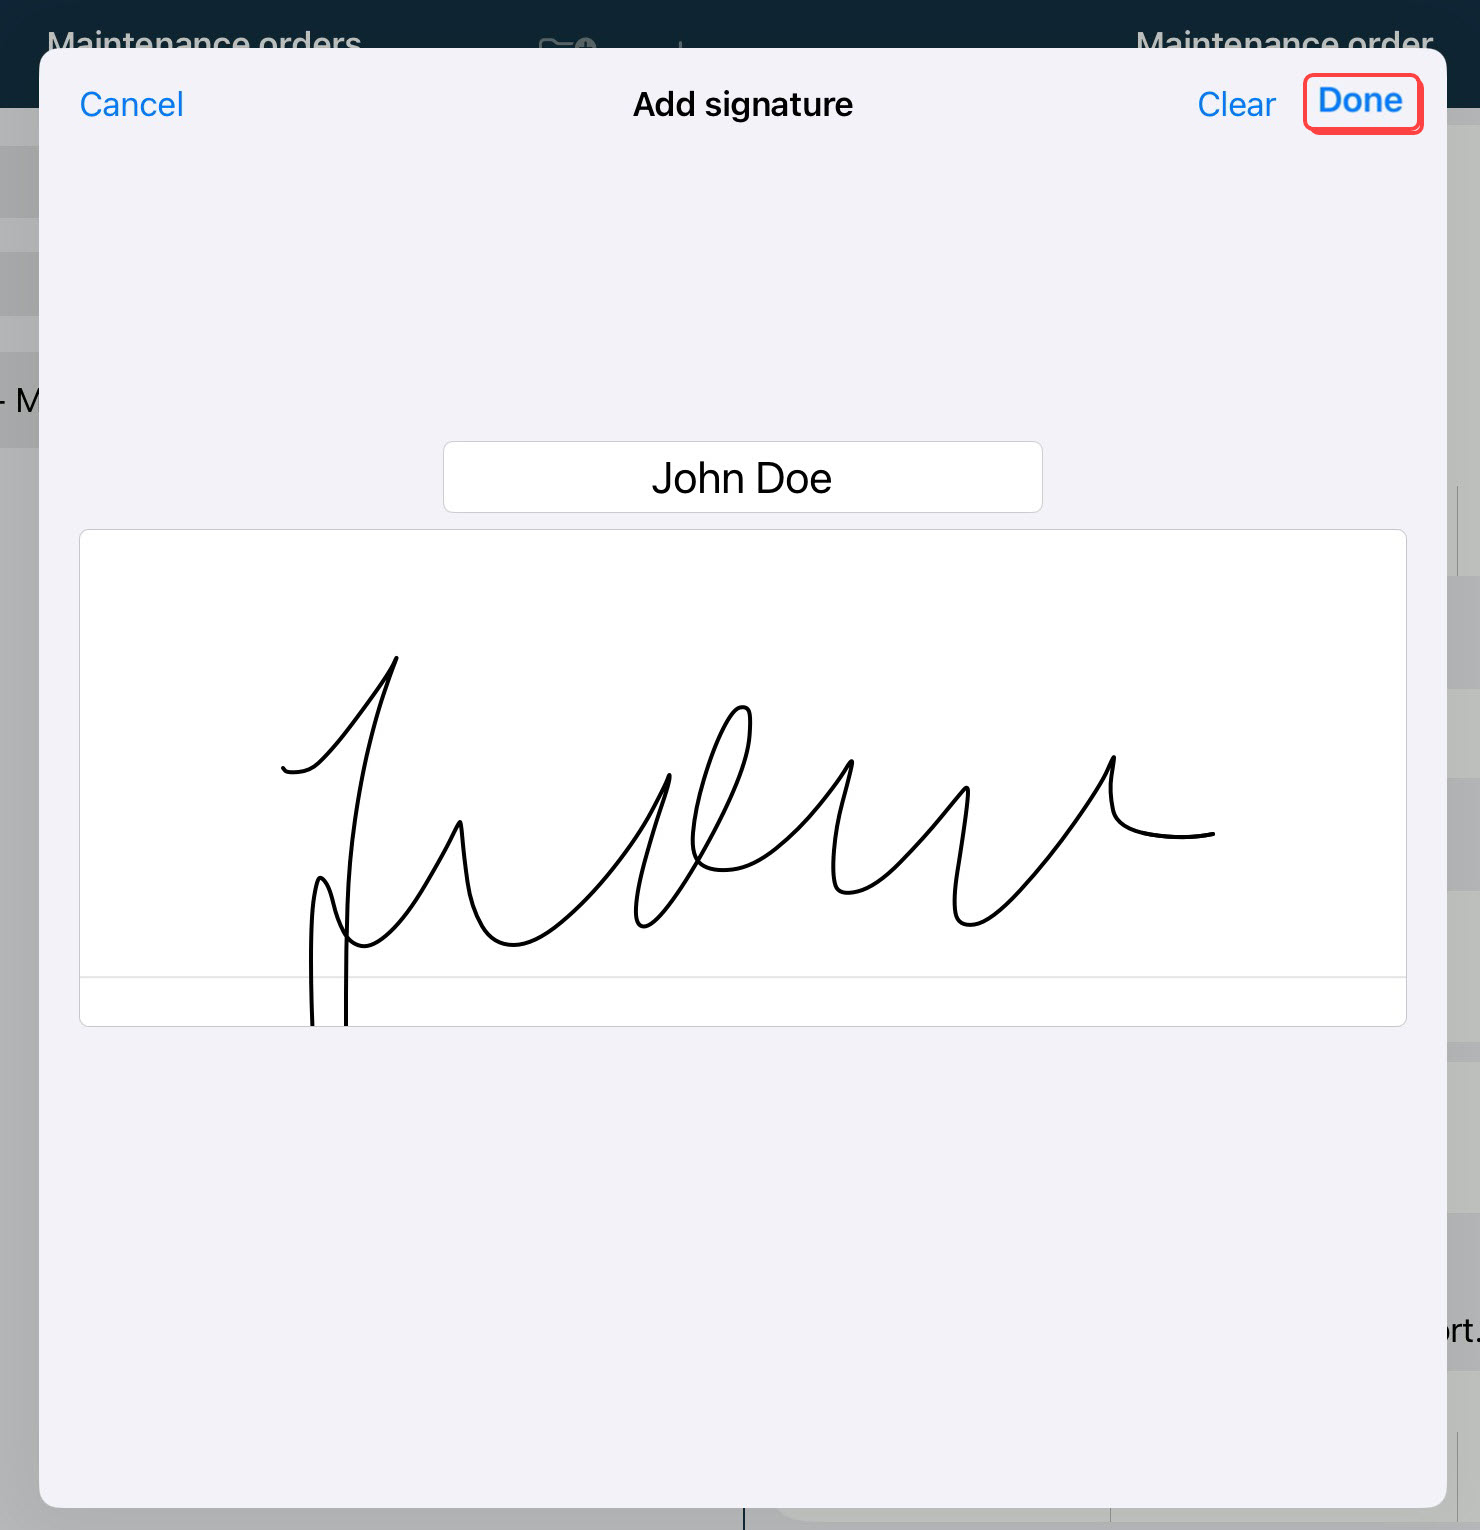
Creating a Maintenance Report
Once all maintenance results have been entered and checked for completeness and accuracy, TabTool automatically generates a comprehensive, professionally prepared maintenance report, including checklists, defect list (if any), and image documentation. For detailed instructions on how to create a maintenance report, refer to the article "How to create a PDF Report".
ARTICLES THAT MIGHT ALSO INTEREST YOU
Was this article helpful?
That’s Great!
Thank you for your feedback
Sorry! We couldn't be helpful
Thank you for your feedback
Feedback sent
We appreciate your effort and will try to fix the article