Creating checklists for maintenance tasks

Modified on Thu, 23 May at 7:11 PM


TABLE OF CONTENTS


In TabTool PV O&M, you have the ability to customize maintenance checklists to meet manufacturer specifications and your own best practices.


Prefabricated checklist modules are available, which can be individually combined and supplemented with your own checkpoints as needed. This ensures that maintenance checklists for your service staff contain only the relevant checkpoints.


To create and edit maintenance checklists, log in to the TabTool Office web application and open the system menu. There, click on the "Checklists" button.


Defining Checklists


To create a maintenance checklist, click on the line "Maintenance Tasks" in the checklist menu. 

Then, click on the "+ New List" button in the right column.


You now have the following editing options available (applicable to both newly created and existing lists):


Enter Name and Description


You can specify a name and description for each list or modify existing information as needed. 


Enter a Translation for Name and Description


If you want to provide checklists in further languages, you can enter translations for the name and description of the checklist.


To do this, click on the blue trianglenext to the language setting "English". This will open text fields where you can enter the corresponding translations.


Defining the Checklist Scope


In the next step, you can define the scope of the checklist. First, choose which of the displayed chapters should be included in the checklist. If you want to remove a chapter, uncheck its checkbox on the right side. 


Since we are creating a maintenance checklist for a string inverter in our example, we deactivate the checkbox next to the "Central Inverter" chapter.


By clicking the black arrowto the left of the checkbox for the "String Inverter" chapter, all checkpoints within the chapter will be displayed. We can remove unnecessary checkpoints from the list by deactivating the corresponding checkboxes.


Editing Checkpoints


If you find important checkpoints missing in your checklist template or if you want to rename existing checkpoints in a maintenance checklist, open the "Edit Checkpoints" submenu in the "Maintenance Tasks" menu of the checklist editor. 


In the right column, you will now see all checklist chapters and their corresponding checkpoints that are already available in TabTool. 


Create an new checkpoint or chapter


You can expand maintenance checklists with as many additional checkpoints and chapters as needed.


The text field for creating a new checklist chapter is located at the end of the checklist overview.


To create a new chapter, enter the desired name in the text field and then click "+".


To add another checkpoint to a chapter, click the button labeled "New Checkpoint," which is located at the end of each checklist chapter.


A window will open where you can enter the desired text for the checkpoint under "Name."


Additionally, you can select the response type for the checkpoint: dropdown menu, text, or textarea.


What do the response types mean?


Dropdown: To complete the checkpoint, it is necessary to select a predefined answer option from a dropdown menu. 


Example:


Text: To complete the checkpoint, a single-line text field must be filled out, allowing input of a limited number of characters. This response option is particularly suitable for checkpoints where, for example, a measurement value or date is requested. 


Example:


Textarea: This response option provides an input field for arbitrarily long texts to complete the checkpoint. It should be used whenever more comprehensive information may need to be provided for a checkpoint. 


Example:


Info: For textarea input fields, TabTool users can store text blocks in the master data, which can be accessed via the symbolnext to the input field. Text blocks allow for templates of commonly used texts to be automatically entered into the textarea.


After entering a name and response type for the new checkpoint, click on the buttonto complete the process. Now the checkpoint will be displayed in the checklist overview and can be further edited if necessary.


Note: Remember to activate newly created checkpoints in the Lists menu (see section "Defining the Checklist Scope") so that they will also be displayed in the maintenance task!


Further Editing Options for Checkpoints:


Moving / Rearranging chapters and checkpoints

You can change the order of individual checkpoints or entire chapters by clicking on theicon in front of the respective checkpoint or chapter heading. Drag the checkpoint or chapter to the desired new position while holding down the left mouse button. If necessary, you can even move checkpoints to another chapter.


Translating chapters and checkpoints into additional languages: 

For pre-defined checkpoints and chapter headings provided by TabTool, translations are available by default in English and Spanish. If you change the name of a checkpoint or chapter, you should also adjust the translation. 


Additionally, you have the option to set up translations in other languages supported by the system. To do this, click on the arrow symbolnext to the language indication in the detail view of a checkpoint or chapter heading (right column). This will open a translation menu where you can enter or edit translations for all languages supported by the system.


You can also translate the dropdown list of response options for a checkpoint into additional languages if needed.


Expanding Dropdown Lists of Checkpoints 


In the "Edit Checkpoints" menu, you can expand the predefined response options of dropdown menus for checkpoints by adding additional response options.


To do this, select the corresponding checkpoint in the checklist overview. In the detail view of the checkpoint in the right column, you will now see the dropdown menu associated with the checkpoint. Below it, you will find a free text field where you can enter an additional desired response option.


You can create as many additional dropdown entries as you like. However, please note that the list becomes difficult to navigate after a certain number of entries. You can delete self-created entries if needed. This is not possible for the entries provided by TabTool.


If there are users in your TabTool package who use the software in languages other than German, it is advisable to directly enter the corresponding translation by clicking on the arrow symbolto the right of the language indication for a new dropdown entry.


Rename Chapters and Checkpoints 

If the name of a checkpoint or a checklist chapter does not fit your needs (anymore), you can easily rename it.


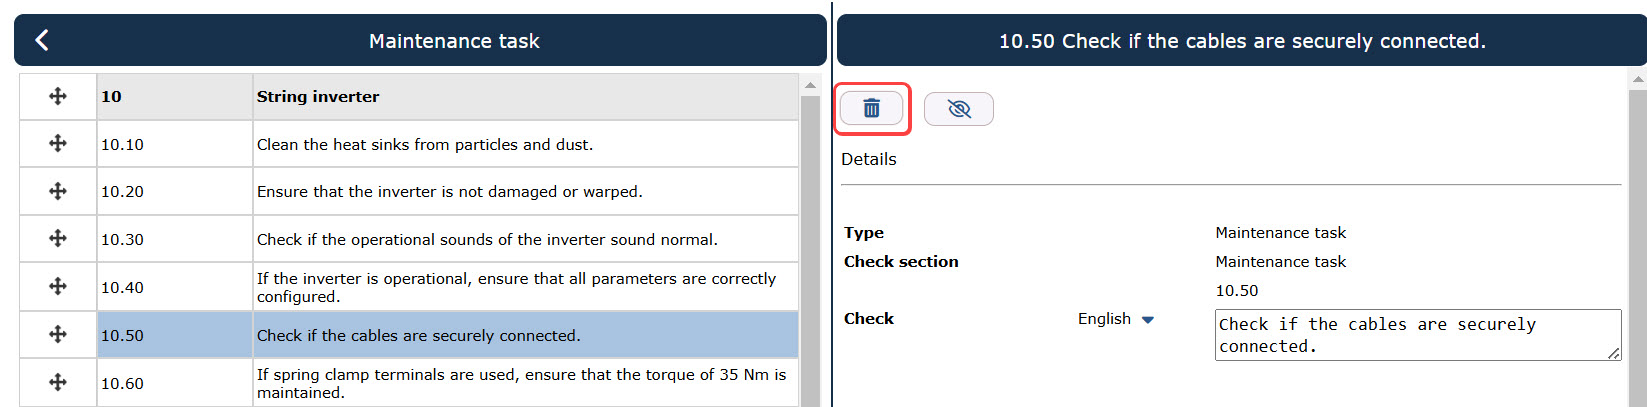
To do this, click on the row of the checkpoint or chapter. In the right column, a detailed overview of this checkpoint or chapter will open. Click on the text field with the name of the checkpoint or chapter and overwrite the existing entry with the desired new name. The system will automatically save the changes.


Hide or delete Chapters and Checkpoints


If you find that you do not need individual checkpoints of a checklist or even entire inspection chapters, you can remove them from the maintenance task checklists in two ways:


a) Delete Chapters / Checkpoints


If you are sure that you do not need a checkpoint or an inspection chapter, you can delete it. To do this, select the checkpoint / chapter in the checklist overview and click on the delete iconin the detailed view in the right column. 


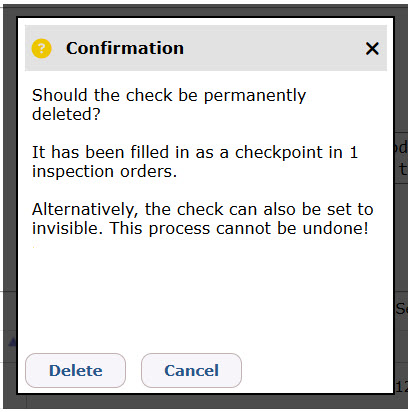
A confirmation window will appear, prompting you to confirm the deletion of the checkpoint / chapter or cancel the action. If the checkpoint / chapter has already been filled in one or more inspection orders, you will be informed about this in the confirmation window.


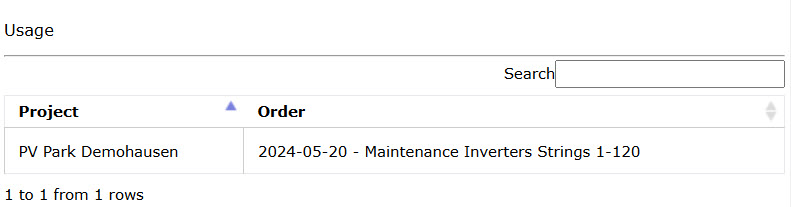
You can find out in which orders the checkpoint / chapter has been filled by checking the detailed view of the checkpoint / chapter. 


Before deleting a checkpoint / chapter that has been filled in an inspection order, make sure that the final inspection report for this order has already been created. Deleting a checkpoint / chapter will remove it retroactively from all previously processed checklists along with the entries made therein.


b) Hide Checkpoints


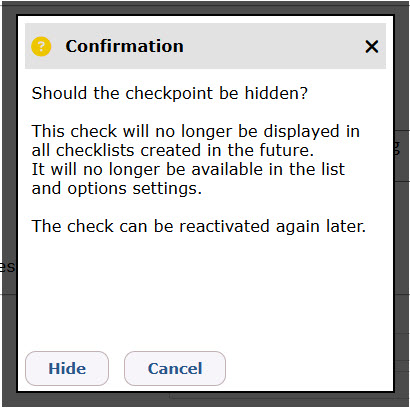
Instead of deleting checkpoints, you can also simply "hide" them. These checkpoints will still be listed in the checklist settings but will not be displayed in the fillable checklists in the maintenance order.


Especially for checkpoints that have already been filled in several maintenance orders, hiding them is a good alternative to deleting the checkpoint.


To hide a checkpoint, click on thebutton in the checkpoint details. This button is located right next to the delete icon.


A window will open, asking you to confirm hiding the checkpoint or cancel the action. 


If you click on "Hide," the checkpoint in the checklist overview will be crossed out and marked with an - symbol. This indicates that you have successfully hidden it, and it will no longer be displayed in the inspection order.


If you want to unhide the checkpoint at a later time, go to the "Edit Checkpoints" menu and click on thebutton in the checkpoint details.


THESE ARTICLES MIGHT ALSO INTEREST YOU


Create a maintenance order

Was this article helpful?

That’s Great!

Thank you for your feedback

Sorry! We couldn't be helpful

Thank you for your feedback

Let us know how can we improve this article!

Select at least one of the reasons
CAPTCHA verification is required.

Feedback sent

We appreciate your effort and will try to fix the article