Recurrent checks: Automate the Scheduling of Inspections and Maintenance

Modified on Mon, 27 May at 1:24 PM

TabTool PV O&M can handle the scheduling and creation of regular inspections for you. This saves you time and ensures that none of the required inspection dates are missed. Below, you'll find the steps to create a recurrent check.


What is a Recurrent Check?


In TabTool PV O&M, a recurrent check refers to a series of inspection or maintenance tasks that repeat at a regular interval from a specified start date or event. The number of future repetitions is determined by the user.


The recurrent check is thus an ideal tool for planning repeat inspections according to DGUV 3 and regular maintenance of PV components.


Creating a Recurrent Check


To create a recurrent check, log in to the TabTool Office web application and open the system menu. Click on the "PV recurrent checks" button


In the "PV Recurrent IChecks" menu, click onto create a new series of tasks. A new window will open, where a task planning assistant will guide you through the creation of a recurrent check.


Defining the scope of the task series


First, select the order type for the recurrent check by clicking on the appropriate line ("Inspection order" or "Maintenance order"). 


Next, specify in which project(s) the recurrent check should be created. Click either on "All Projects" or on a specific project from the list.


Now you can choose the scope of the inspection or maintenance for the recurrent check. The displayed options correspond to the inspection or maintenance checklists available in your TabTool package.


Inspection


For maintenance, select the maintenance scope from a dropdown menu for the components to be serviced.


Maintenance


Now specify which types of components you want to inspect or maintain as part of the order series ...


... and then indicate whether the order series applies to all existing components of a type or only to specific components.


For maintenance tasks, you can also decide in the next step whether you want to inspect all selected components together in one order (this is the usual procedure for inspections) or whether you want to create a separate inspection form for each component (as is often the case for maintenance).


Once you have chosen a condition for creating the order series, you will be taken to a form that summarizes your previous entries under the title "Scope of the Order Series."


Interval and Starting Point


Below this summary, you will find text fields where you can enter a name for the recurrent check and specify the interval for its repetition.


From the dropdown menu, you also select the date or event that will serve as the starting point for calculating the recurrence interval.


The following options are available: 


  • Last Deadline of the Order: The last set execution deadline in the current order (or a freely selectable first deadline when creating the series) serves as the starting point for calculating the next date in the task series. With this starting point option, only one task can be scheduled in the future at a time. 


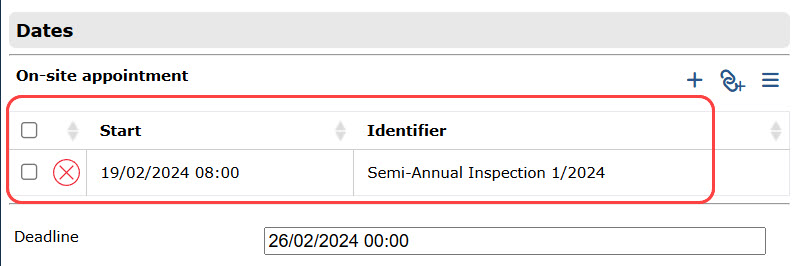
  • Last Order Execution (Date of On-site Appointment): When the status of the current order is set to "completed" (green marker), the next date in the task series is calculated based on the on-site appointment linked to the current order. With this option, the date for the first execution of the series can also be set freely. 


For all starting point options except the two mentioned above, you can specify in the next section of the form how many follow-up tasks should be automatically pre-scheduled in the given interval:


Set action before the deadline of a task


In the form section "Action before the next deadline is reached", you can plan one or more actions to be executed when the next task of a recurrent check is approaching.


You can...

  • create a ticket in the corresponding TabTool project to notify about the upcoming deadline
  • send a reminder email and/or app notification to the contact responsible for the order
  • automatically set the status of the new order file to "open" (red marker)


To activate these actions, check the corresponding boxes and specify in the text field above the selection how many business days before the order deadline the action(s) should be executed.


Enter Initial Data


In the final section of the setup form for the recurrent check, you can enter initial data to be pre-filled in each future order of the task series.

For the order number and subject, the system provides default placeholders, which you can change if needed.

If reminder notifications are to be sent before the next order deadline, you must fill out the "Carried out by" field in the initial data.

To do this, click the buttonin the "Carried out by" row. A dropdown menu will appear, allowing you to select the responsible person.


All other fields in the initial data section are optional.


Once you have entered all the desired information, click on thebutton to complete the creation of the recurrent check.


Tip: If the newly created series of checks is not yet listed in the recurrent checks, refresh the page using the refresh button in your browser. Now the new recurrent check should be listed at the end of the list. 


Editing Recurrent Checks


To edit an existing series of checks, locate it in the list of recurrent checks and click on the settings iconon the right side of the list entry.


You are now back in the form that was displayed to you when creating the recurrent check after completing the order planning assistant.


Here you can edit the information previously provided to make changes.


If you want to modify data from the "Scope of the Order Series" section, click on the buttonat the top of the window. You will be guided through the last steps of the order planning assistant to make these changes.


Note: The project and order type of a recurrent check cannot be changed after it has been created. To change this information, you need to delete the existing order series and create a new one.


Finally, you will return to the overview form of the order series and can save your changes by clicking on thebutton.


Normally, the next execution of the updated order series will take place from 6 a.m. the following day. If you want to ensure that the modified recurrent check becomes active immediately, click on the button.


Delete a Recurrent Check


To delete a recurrent check and all existing as well as future orders in this series, click on the settings icon on the right side of the respective list entry, and in the window that opens, click on thebutton.


Edit orders of a task series


To edit the orders of a task series, click on an entry in the list of recurrent checks. In the right column, you will see all the scheduled orders of the order series (if they have already been executed). 


By clicking on one of the orders in the right column, a quick view of the order file will open. In this view, you can edit text fields and dropdown menus, but you cannot set relations, such as linking responsible persons or defects. 


To fully edit the order, click on thebutton in the top left corner of the quick view window. This will take you to the order file of the respective order, where you can edit all details.


Was this article helpful?

That’s Great!

Thank you for your feedback

Sorry! We couldn't be helpful

Thank you for your feedback

Let us know how can we improve this article!

Select at least one of the reasons
CAPTCHA verification is required.

Feedback sent

We appreciate your effort and will try to fix the article