To assign the correct project role to Ms. Meier, you need to add the designation "Technical Lead O&M" to the appropriate dropdown list.
Here’s how you do it:
In the left-hand menu under "Administration", click on Master Data.
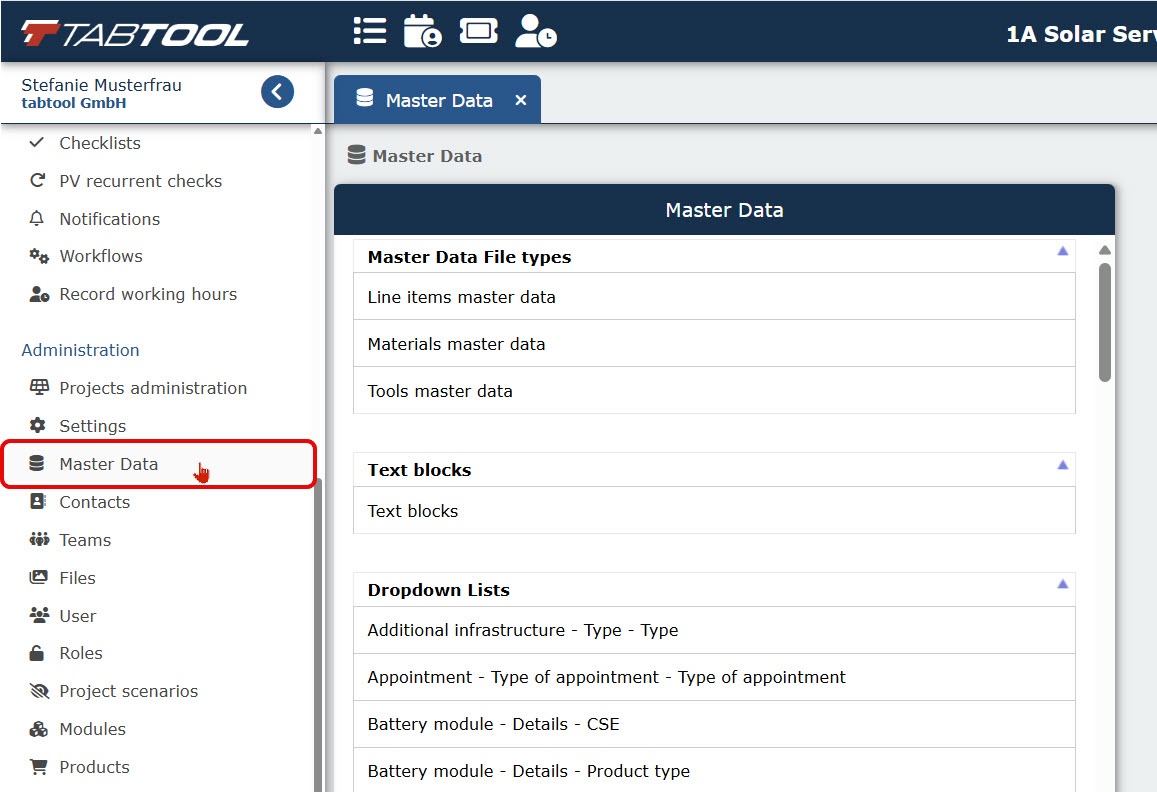
You will now see a list of file types that you can customize individually. Among other things, this list includes all editable dropdown menus. The naming convention for dropdown lists follows the structure: “File Name – Attribute Group – Attribute.”
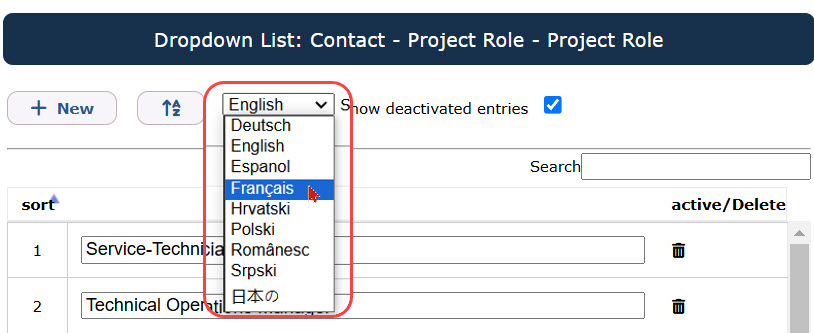
The list we want to edit is named "Contact – Project Role – Project Role." By clicking on this entry, a column will open on the right where you can edit the dropdown list.
To add a new list entry, click on the "+ New" button at the top left of the menu bar.
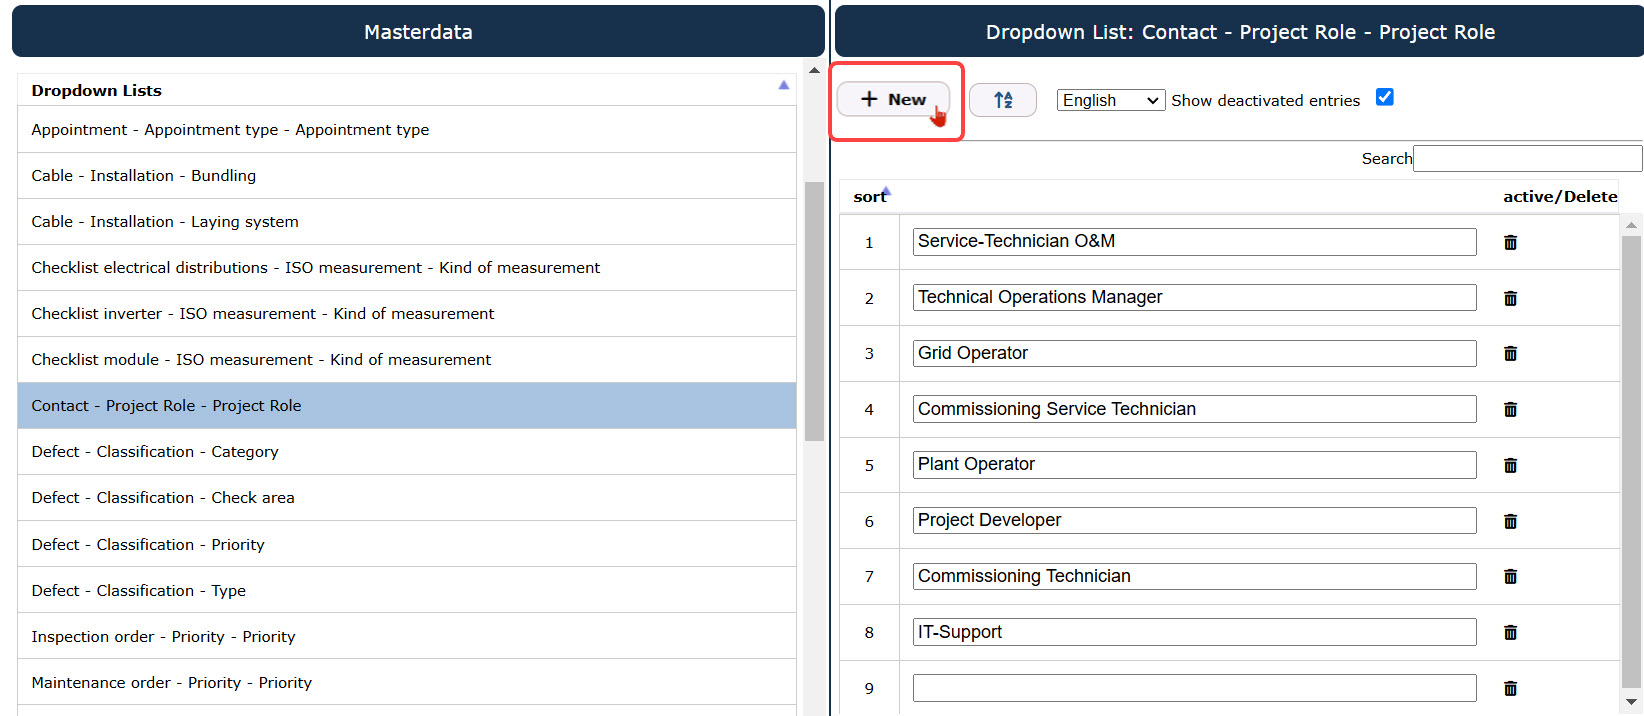
A new text field will then appear (in our example in position 9), where you can enter the new project role "Technical Lead O&M."

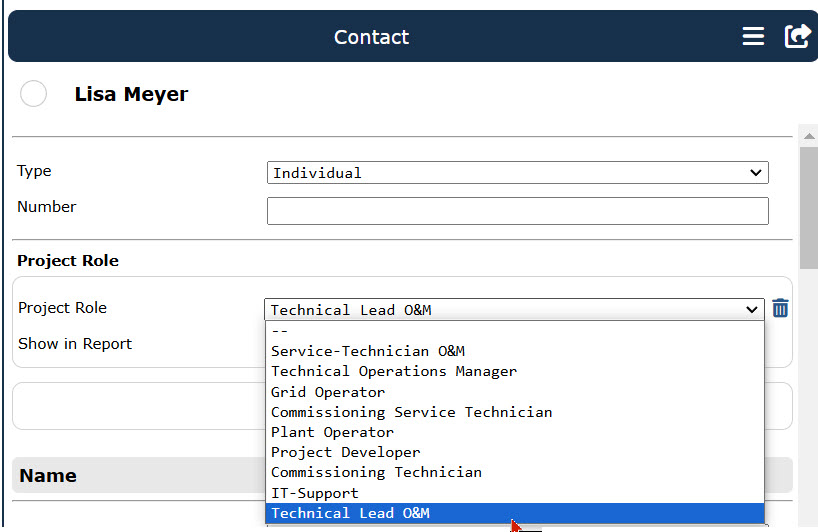
Now you can open the contact entry for Lisa Meyer and assign her the newly added project role:
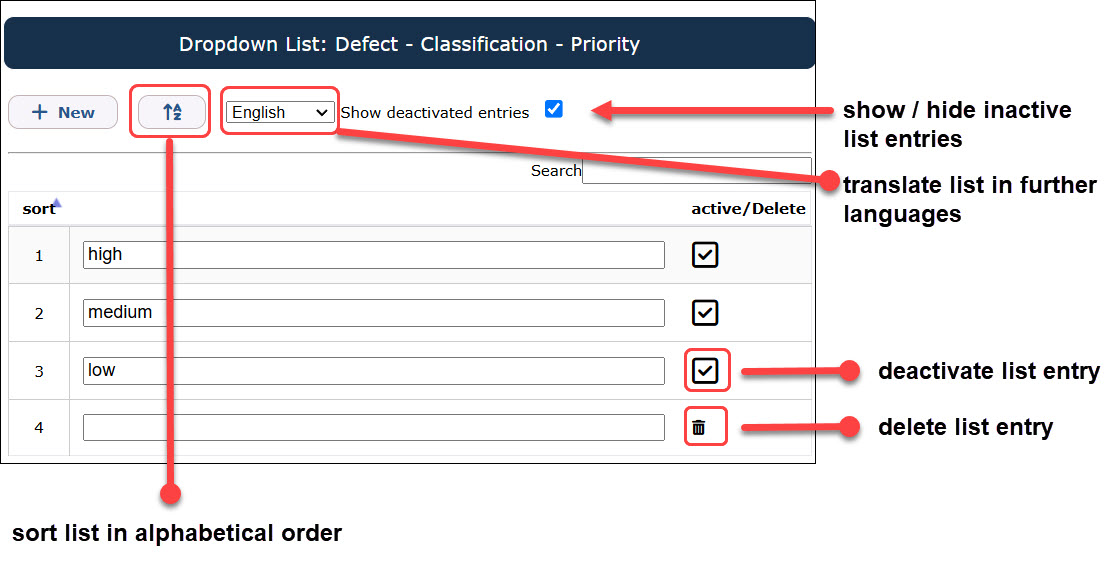
What other editing options are avaliable for dropdown lists?
In addition to adding entries, as illustrated in our example above, the following editing options are available to you:
Renaming Entries
You can rename existing entries if you want a different designation for a list item. Simply click into the text field of the entry and replace the existing name with your desired one.
Note that the new designation will be retroactively applied to all existing records where the modified list entry was used.
Changing the Order of Entries
You can change the order of entries. There are two options available:
a) Alphabetical Order: If you want to sort the list alphabetically, click the designated button.
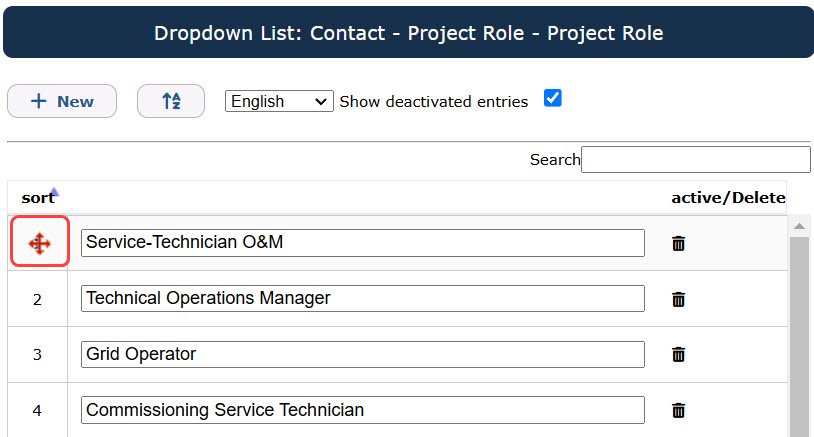
b) Custom Order: If you want to freely adjust the order of entries, for example, to move the most frequently used options to the top of a longer dropdown list, click the number to the left of the list entry you want to move.
Your cursor will change to a cross shape, indicating that you can now drag and move the selected entry.
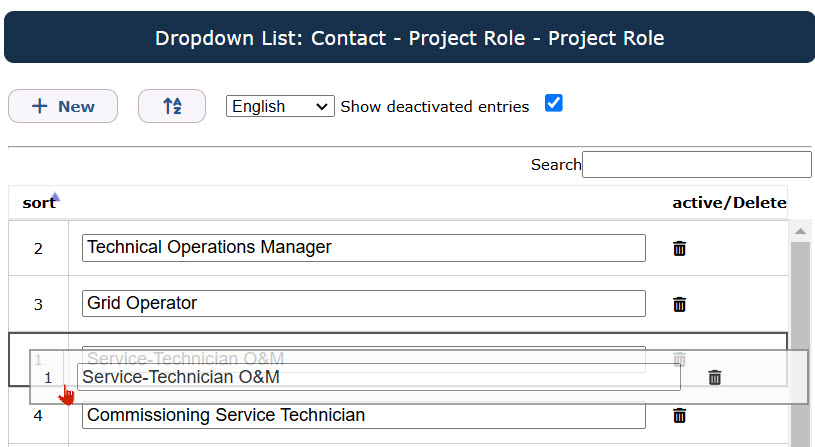
Hold down the left mouse button and drag the selected entry to the desired position.
Deactivating or deleting Entries
Do you want to remove existing entries from a dropdown list because they are no longer relevant?
No problem, this is possible. However, the procedure differs depending on whether a list entry was predefined by TabTool or created by you.
Deactivating Predefined Entries
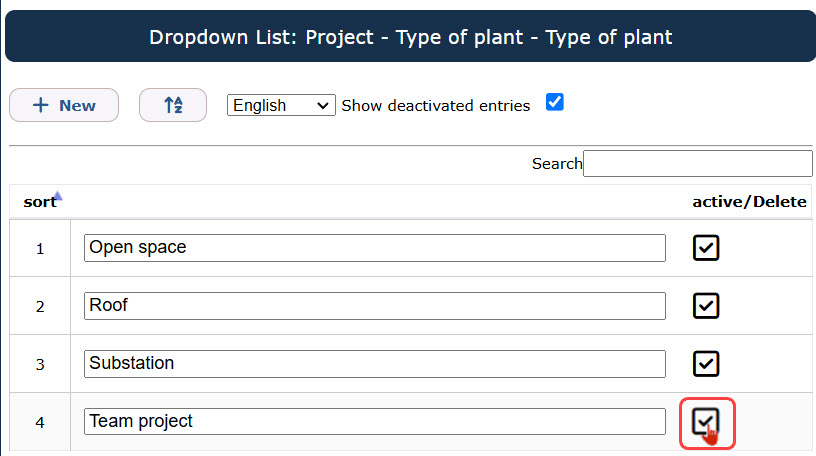
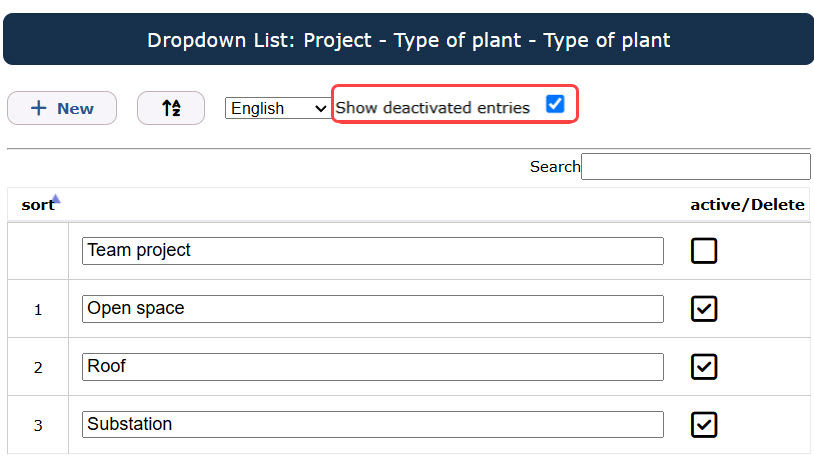
Dropdown list entries that were predefined by TabTool cannot be deleted but can only be deactivated. In our example, we want to remove the entry "Team Project" from the dropdown list "Plant Type."
To do this, click on the checkbox to the right of the list entry.
A window will open, informing you how many records currently use the entry you wish to deactivate.

If the entry, like in our example, is not yet used in any record, you can safely choose the option "Continue without Transfer."
If the entry is already being used in records, you should assess whether deactivating it could result in information loss. Deactivation will retrospectively affect existing data entries in TabTool.
Instead of the deactivated entry, the value "--" will appear in all records where the list entry was used.
Therefore, in the input window, you have the option to replace the entry to be deactivated with another entry from the dropdown list.
If none of the existing entries are suitable, you may need to create a new appropriate list entry before deactivating the unsuitable one.
Alternatively, you can choose to rename the unsuitable entry instead of deactivating it (instructions provided above).
By clicking the "Next" button, you complete the deactivation of the list entry. It will still be listed in the master data as a list entry, but now with an empty checkbox. On the user interface, the inactive entry will no longer be displayed in the dropdown list.
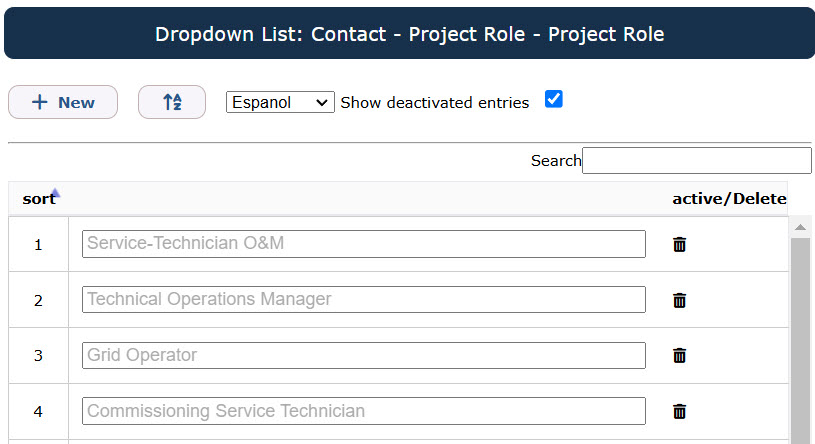
If you also want to hide inactive list entries in the master data, remove the blue checkmark next to "Show deactivated entries."
Deleting user-created Entries
Entries in dropdown lists created by users can be deleted from the list if needed. You can identify user-created and thus deletable entries by the trash can icon located to the right of the list entry.

With a click on the trash can, a window opens informing you about how many records the entry to be deactivated is currently used in. If the entry, as in our example, is not yet used in a record, you can safely choose the option "Continue without transfer."

If the entry is already used in records, you should check if its deletion could result in information loss. Deleting the entry will retroactively affect existing data entries in TabTool. Instead of the deleted entry, the value "--" will appear in all records where the list entry was used.
Therefore, in the input window, you also have the option to replace the entry to be deleted with another entry from the dropdown list. If none of the existing entries are suitable for this replacement, you should consider creating a new appropriate list entry before deleting the unsuitable one.
Alternatively, you have the option to simply rename the unsuitable entry instead of deleting it (see instructions above).
By clicking the "Next" button, you complete the deletion of the list entry.
Translating dropdown lists into other languages
You can provide translations for dropdown lists in all languages available in TabTool. Additional translations are possible upon request; please contact TabTool Support for assistance.
To create a translation for a dropdown list, select the desired language from the language menu in the master data entry of the respective list.
For pre-defined list entries provided by TabTool, there may already be a translation available in your target language. If this is not the case, you will see the original list entry displayed in light gray text in the text fields. You can override this by clicking on the text field and entering the desired translation.