TABLE OF CONTENTS
- Enter name and description
- You can enter a name and description for each list or change existing information as desired.
- Enter translations for name and description
- Define the scope of the checklist
Editing sections and checkpoints
- 1. Move / reorder sections and checkpoints
- 2. Rename sections and checkpoints
- 3. Translate sections and checkpoints into other languages
- 4. Create new sections and chapters
In TabTool PV O&M, you can tailor inspection checklists precisely to match the scope of services agreed upon in the service contract. Predefined checklist components are available, which can be individually combined and supplemented with custom checkpoints as needed. This ensures that the inspection checklist for your service staff includes only the checkpoints relevant to their tasks.
To edit inspection checklists, log in to the TabTool Office web application. In the left menu bar, click on "Modules" and then choose "Checklists".

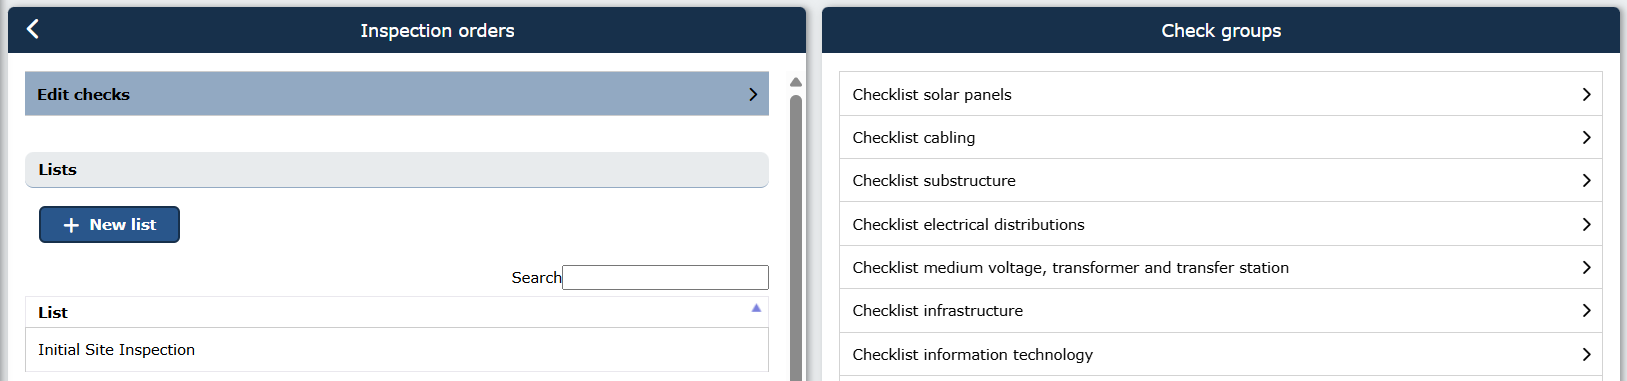
A window opens with the "Checklists" menu. Click on the menu item "Inspection orders":
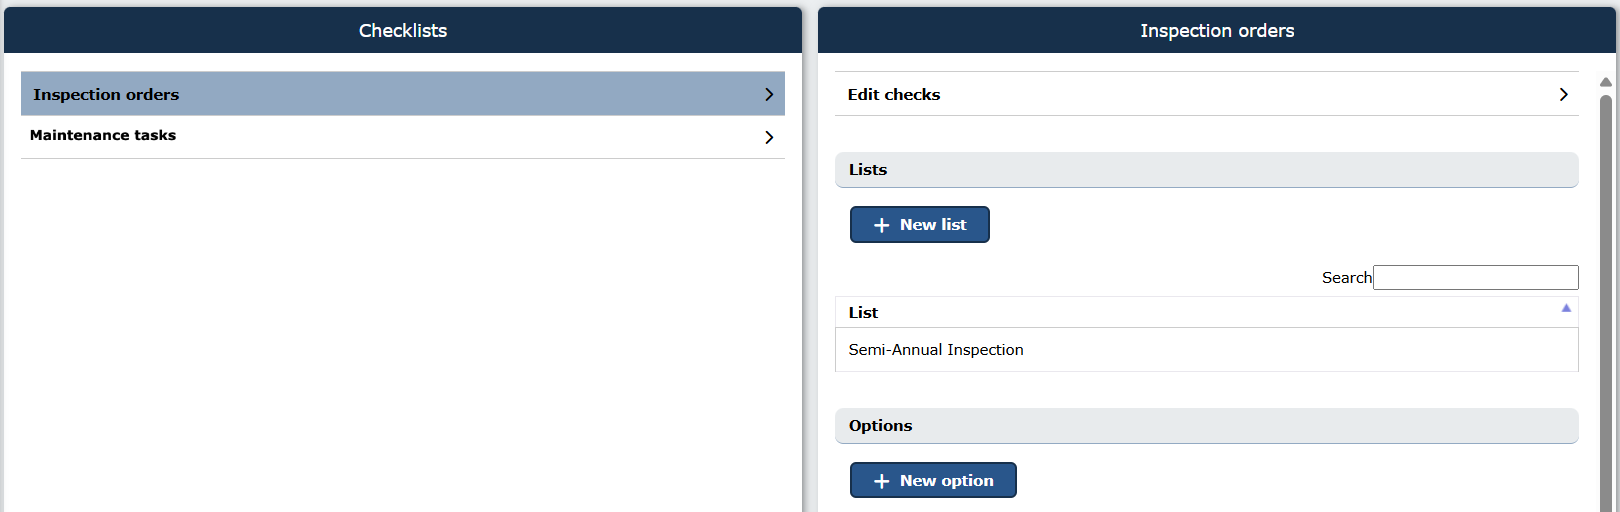
Here you can choose between the following menu items:
Edit checks
Under this menu item you can edit and customize the sections and checkpoints available for creating inspection checklists in detail.
Lists
Under this menu item you can define the checklists and scopes for your main types of inspections or inspection services, such as commissioning inspection, annual inspection, periodic inspection according to DGUV 3 and more.
Options
Here you create and edit the checklists for optional tests that you carry out in addition to your main inspections, e.g. thermography examinations, performance measurements, etc. The options for editing the checklists are the same as for the "Lists" menu item.
Defining lists and options
In the "Lists" menu you will already find some predefined lists that you can edit to adapt them to your specific needs.
Additionally, you have the option to create a new inspection checklist by clicking the button
The following editing options are available for both existing and newly created lists:
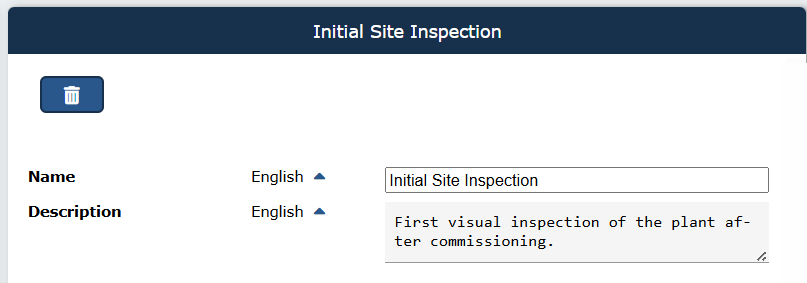
Enter name and description
You can enter a name and description for each list or change existing information as desired.
Enter translations for name and description
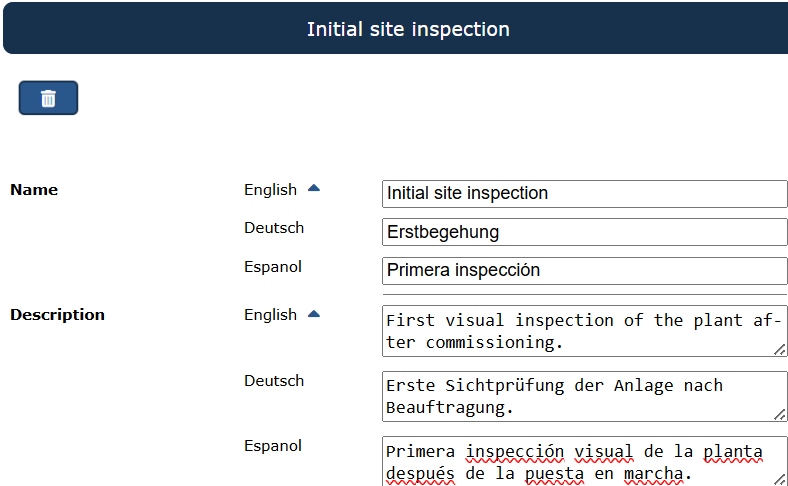
If you want to provide checklists in languages other than English, you can enter translations for the checklist's name and description.
To do this, click the blue triangle next to the language setting "English". This will open text fields where you can input the corresponding translations.
Define the scope of the checklist
In the next step you can define the scope of the checklist.
First, select which of the displayed inspection groups (solar panels, cabling, substructure, etc.) should be included in the checklist. If you want to remove an inspection group, uncheck its checkbox on the right side.
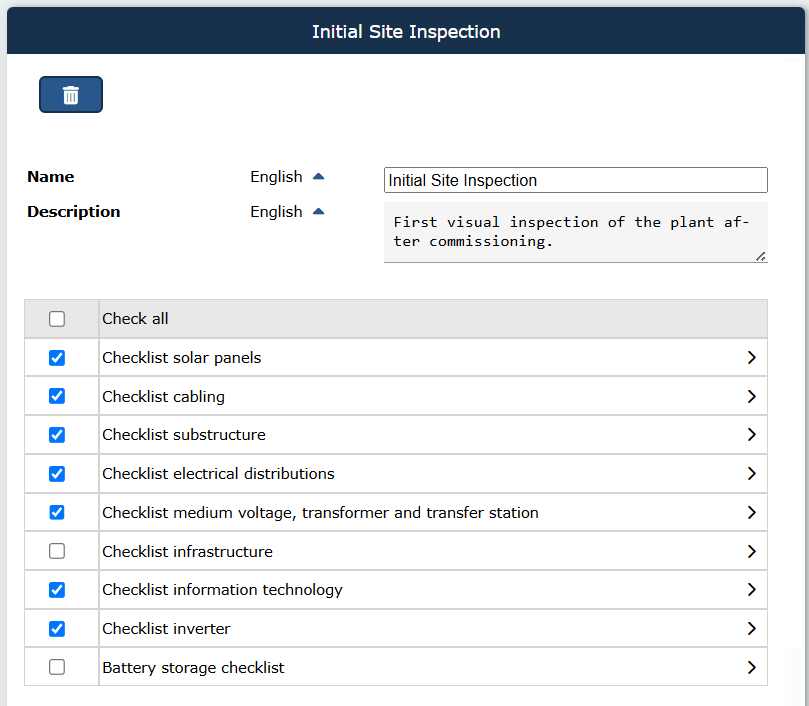
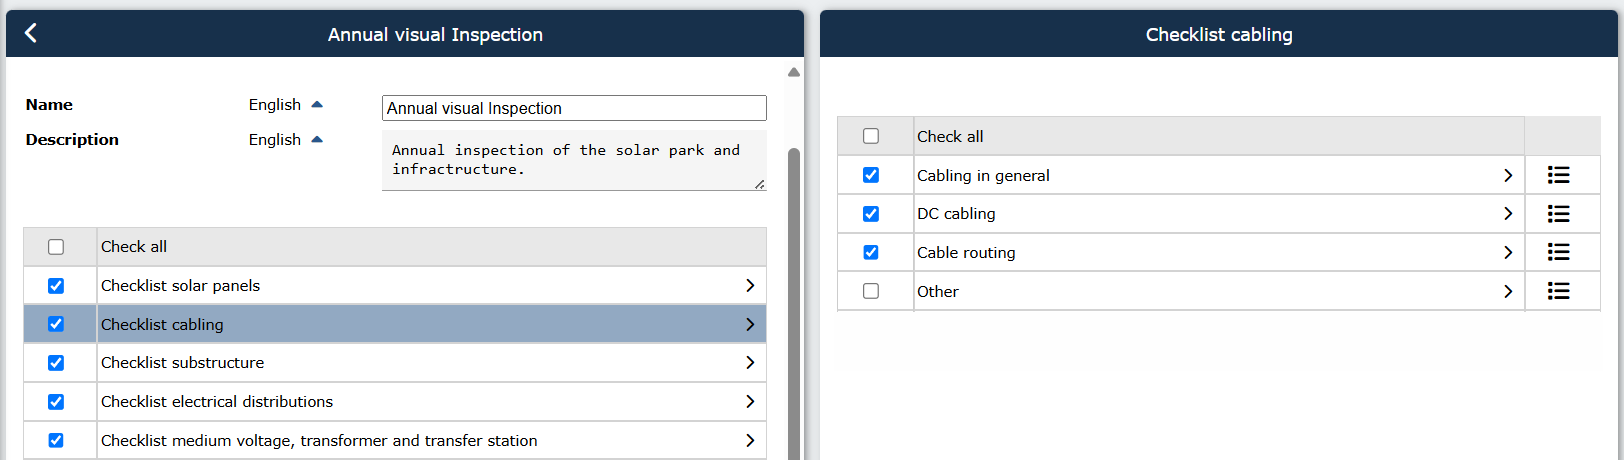
You can also define the scope of each individual inspection group more precisely. To do this, click the black arrow next to the checkbox of the inspection group. You will then see which sections are included in the checklist for that inspection group. You can deselect sections by clicking their checkbox, thereby disabling them.
By clicking the arrow next to the checkbox of a section, you can open it and view the checkpoints included in that section. Here as well, you can remove or (re)add individual checks to the checklist by clicking their checkboxes.
You can also define the scope of the service options you have created (under the "Options" menu) in the same way described above.
Note: Remember to activate newly created sections or checks (under “Edit checkpoints”, see below) so that they are displayed in the inspection order!Editing checkpoints
Do you want to rename individual sections or checks? Or even add new checks or sections? Then the "Edit checks" menu is the right place for you!
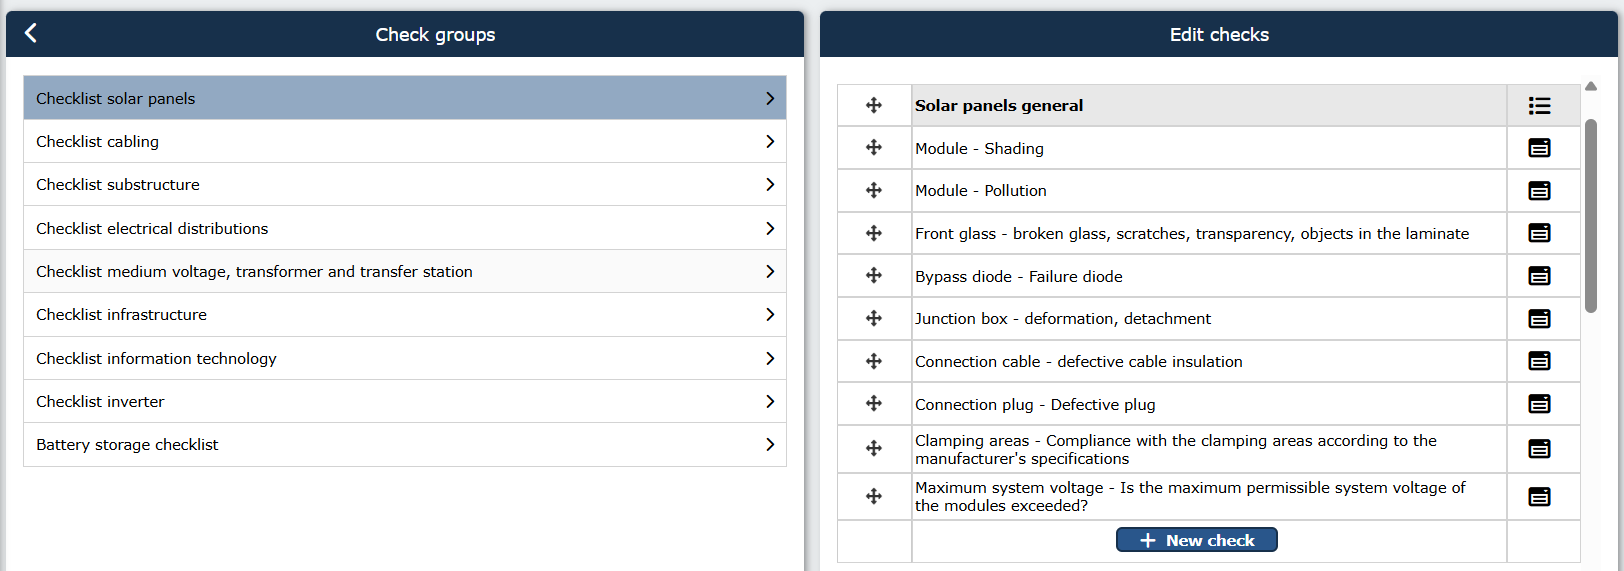
First, select the inspection group you want to edit, such as solar panels, substructure, or inverters.
Now, the right column will display all available sections and checks for the selected inspection group.
To edit a section title or checkpoint, click on the corresponding row. The following editing options are available:
1. Move / Reorder Sections and Checkpoints
You can change the order of individual checkpoints or entire sections.
To do this, click on the  handle icon before the corresponding check or section title and drag the check or section to the desired new position while holding the left mouse button.
If needed, you can even move checks to a different section.
2. Rename Sections and Checkpoints
If the name of a checkpoint or a checklist section doesn't fit your needs, you can easily rename it.
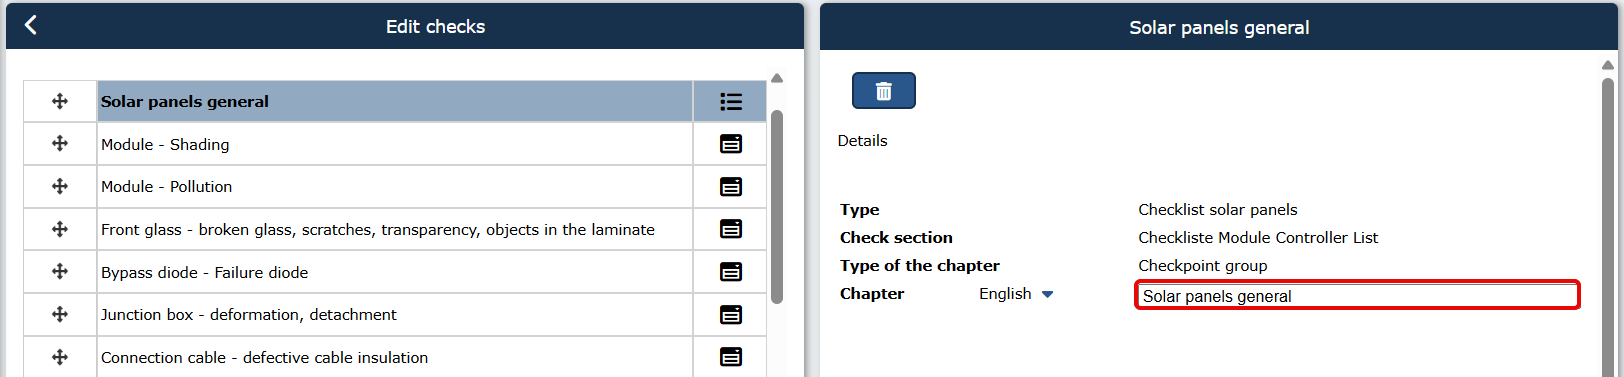
To do this, click on the row of the check or section. A detailed view of the checkpoint or section will then open in the right column. Click into the text field with the name of the check or section and overwrite the existing entry with the desired new name. The system will automatically save the changes.
3. Translate sections and checkpoints into other languages
For predefined checkpoints and section titles in TabTool, translations are provided by default in German and Spanish. If you change the name of a check or section, you should also update the translation, especially if there are users who access TabTool in a language other than English.
To do this, click on the arrow icon  next to the language setting in the detail view of a checkpoint or section title (right column). This will open a translation menu where you can enter or edit translations.
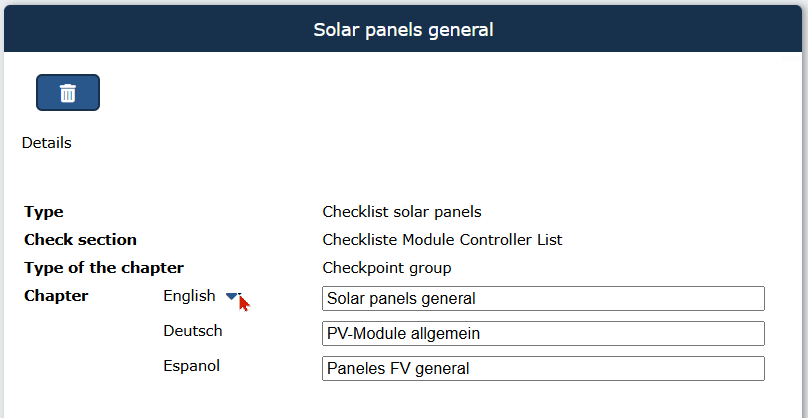
You can also translate the dropdown list with the answer options of a checkpoint into additional languages if needed.
4. Create new sections and checkpoints
You can find out how to create new sections and checks, and how to delete or hide sections and checks when required, here: Editing checklist sections and checkpoints
YOU MIGHT ALSO BE INTERESTED IN THESE ARTICLES
Was this article helpful?
That’s Great!
Thank you for your feedback
Sorry! We couldn't be helpful
Thank you for your feedback
Feedback sent
We appreciate your effort and will try to fix the article